
Injection mold acceptance is the point where a tooling project moves from an engineering build to a controlled production asset. It is not simply the moment a toolmaker reports that the mold is complete, or when a few parts look acceptable in a video call. A buyer needs evidence that the released tool can make the defined part, that the sample set was produced under an understood condition, and that open items have an owner and a documented disposition. The exact acceptance scope should follow the product, customer and contract rather than a universal checklist.
For procurement and product teams, the safest approach is to separate four questions: was the mold built to the approved design, can it run safely and repeatably on the intended machine, do representative parts meet the released requirements, and has the toolmaker delivered the information needed for maintenance and future production? Use the [quality](/quality) and [process](/process) pages to align the evidence request with your internal workflow, then preserve the final decision with the tooling record.
Do not sign off a mold because the first samples look good. Approve a defined revision, tool condition, material basis, trial record, inspection scope and list of remaining actions; if one of those is unknown, the decision should be conditional rather than implied.
01
1. Define what tooling acceptance is supposed to release
Before the final trial, write the acceptance boundary in terms that a buyer, toolmaker, quality engineer and production team can interpret the same way. Identify the part number and revision, mold number, cavity count, resin grade and colour, intended machine range, target cycle or throughput assumptions, cosmetic standard, critical-to-quality features, sample quantity and required documents. If the mold will be transferred to another molding supplier, state whether acceptance covers the tool only, the molded part, or both.
A released drawing or model should identify the datums, functional interfaces, tolerances and appearance zones that will be judged. ISO 20457 provides a framework for tolerances and acceptance conditions for plastic molded parts, but it does not replace product-specific requirements or an agreed measurement method.[1] Avoid turning an informal supplier assumption into an acceptance criterion after the tool has been built. Open points should be recorded in a decision log with an owner, due date and effect on release.
The commercial handoff also matters. Link the acceptance decision to the purchase order, approved tool design, change history and payment milestone. If tooling ownership, storage, maintenance or export packaging are relevant, route those terms through the commercial agreement and the [request-a-quote](/request-a-quote) conversation rather than treating a signed sample report as proof of ownership.
| Evidence area | What sign-off may confirm | What it does not prove alone |
|---|---|---|
| Tool construction | The released mold design, components, cavity count and marked changes are accounted for | Long-run process capability or product qualification |
| Trial record | The tool ran under a recorded machine, material and parameter condition | That the same result will occur across every machine, lot or service condition |
| Sample inspection | The stated sample set meets the measured requirements in scope | Unmeasured dimensions, future revisions or every cavity if not sampled |
| Functional and cosmetic review | The agreed assembly, appearance and use checks passed | Regulatory or customer approval not included in the review |
| Handover package | The receiving team has the agreed drawings, records and maintenance information | That undocumented assumptions are safe to ignore |
02
2. Inspect the mold itself before judging the parts
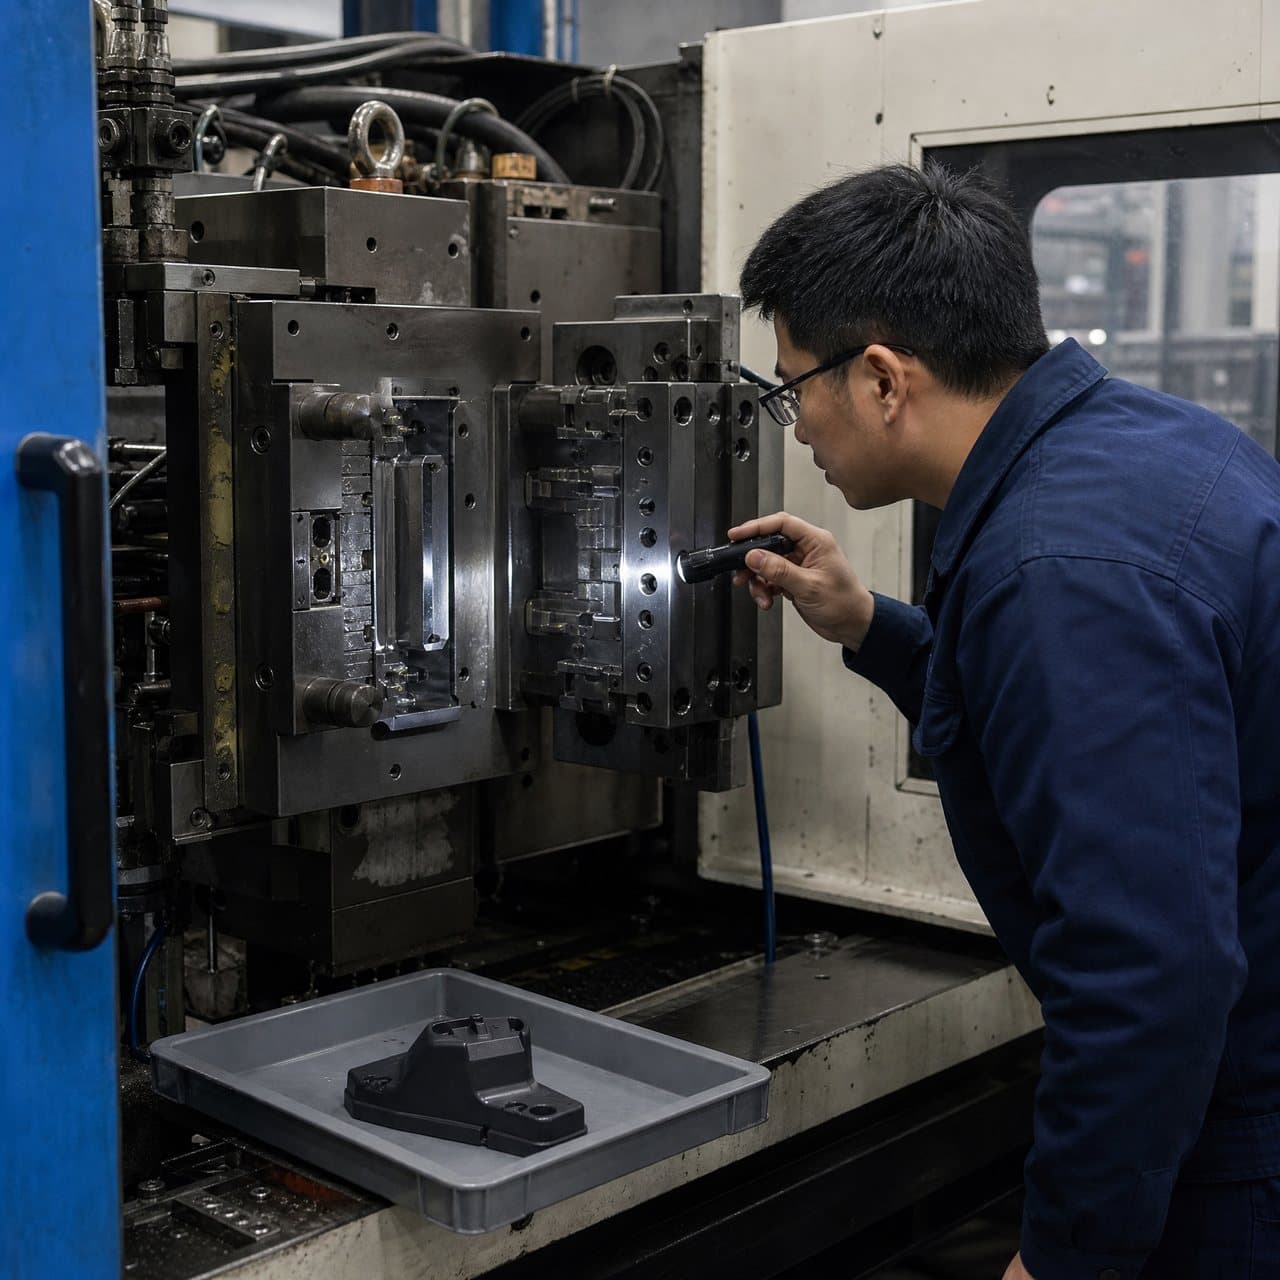
A tooling acceptance checklist should begin with the physical mold. Confirm identification plates, revision marking, overall dimensions, lifting features, locating rings, sprue bushing or hot-runner interface, water ports, electrical connections, sensors if specified, and compatibility with the intended press. Compare the cavity count, part orientation, inserts, slides, lifters, cores, unscrewing mechanisms and interchangeable components with the approved tool design. Photograph the as-built condition and mark any approved deviation.
Open and close the mold using the agreed safety procedure. Check smooth movement, guide components, leader pins and bushings, parting-line contact, shutoffs, slide return, core sequencing, ejector return and positive stops. Look for witness marks, abnormal resistance, exposed sharp edges, loose hardware, inadequate support or evidence that a component is being forced into position. A visual inspection cannot establish fatigue life, but it can identify conditions that should be corrected before a production trial.
Cooling deserves a recorded test rather than a statement that channels are present. Identify each circuit, verify that ports are labelled, check for leaks at the specified pressure or method, and record flow or temperature evidence when those values are part of the project requirement. For hot-runner tools, confirm controller and thermocouple identification, insulation, nozzle configuration and the agreed cold-start or shutdown procedure. Keep the test method and limits with the report so a later team does not mistake an undocumented check for a passed requirement.
03
3. Make the trial evidence traceable to a real condition
A trial report should identify the tool, part and drawing revisions; machine and date; cavity or cavity group; resin manufacturer and grade; colour or additive basis; material lot where required; drying or conditioning state; machine settings; cycle information; operator or reviewer; and the sample identification. The purpose is traceability, not paperwork for its own sake. If a sample cannot be connected to a tool revision and material condition, its acceptance value is limited.
Distinguish a debugging trial from an acceptance trial. A trial used to find flash, short shots, burn marks, warpage or ejection issues may intentionally use changing parameters. A sign-off trial should use a defined and recorded condition that the parties agree is representative of the intended production route. This does not mean one trial proves every future production result. It means the buyer can understand what the evidence supports and what still needs process qualification or monitoring.
For multi-cavity molds, record cavity identity and avoid pooling parts in a way that hides cavity-to-cavity variation. For family molds or insert tools, identify the configuration and component set. A sample quantity should be tied to the risk and customer requirement; do not imply statistical capability from a handful of parts. If the program needs capability indices, run-at-rate evidence, a control plan or a customer-specific submission, define that separately from the basic mold sign-off.
04
4. Review molded samples against CTQs, fit and appearance
Start the sample review with identity and condition. Confirm the part revision, material, cavity, sample date, conditioning state and any trimming or secondary operation. Then inspect the critical dimensions and datums using the agreed method. A CMM report can be useful for location and profile, while optical measurement, gauges, fixtures or functional checks may be more appropriate for flexible, transparent, textured or difficult-to-probe features. NIST notes that measurement uncertainty should be considered in coordinate measurement work; a result close to a limit deserves a method review rather than false precision.[2]
Check assembly with the intended mating parts, fasteners, seals, inserts or adjacent components. Record insertion force, retention, movement, seal condition or torque where relevant, and state whether the check is qualitative or measured. Review parting lines, gate vestiges, ejector marks, weld lines, gloss, texture, colour, flash, sink, warpage and damage against approved visual standards and lighting conditions. If appearance is important, use limit samples or photographs with defined viewing conditions rather than the phrase “looks good.”
Use a disposition matrix with three outcomes: accepted, correction required, or conditionally accepted with a written concession. A concession should identify the affected requirement, exact condition, quantity or time limit, responsible approver and whether the tool or part drawing will change. ASME Y14.5 provides a common language for dimensioning and tolerancing, but the buyer still needs to identify which requirements are critical and how they will be inspected.[3]

05
5. Close the sign-off with a controlled handover package
The final tooling package should be proportionate to the program, but it commonly includes the approved mold design or as-built drawing, component and spare-parts list, steel or insert information where contractually required, cooling and electrical diagrams, operating instructions, trial and parameter records, inspection report, sample photographs, material information, maintenance schedule, change log and open-action list. Confirm which files are native, which are released PDFs, and who controls future revisions.
Maintenance information is part of acceptance because an undocumented tool can lose its approved condition during storage, transfer or production. Record lubrication points, inspection intervals, wear limits if defined, cleaning and preservation requirements, hot-runner precautions, water-circuit care and recommended spare parts. If the tool will be held between orders, agree packaging, corrosion prevention, storage environment, ownership access and release checks. InjeForm’s [capabilities](/capabilities) and [process](/process) pages provide useful context for framing those handoff questions without assuming a particular factory arrangement.
Sign-off should name the approver, date, tool and part revisions, evidence reviewed, accepted deviations, remaining actions and release status. A useful status vocabulary is released, conditionally released, rejected for correction, or held pending evidence. Avoid a blank signature that could later be read as unconditional acceptance. If changes are made after approval, use a change-notification route and decide whether the affected dimensions, samples, functional checks or documents must be repeated.
06
6. Decide whether the evidence supports release or another trial
A final decision should follow the evidence matrix rather than the calendar. Release may be reasonable when the tool matches the approved design, safety and interface checks pass, the defined samples meet the in-scope requirements, open actions are closed or formally accepted, and the handover package is complete enough for the receiving team. Conditional release can be appropriate when a non-critical item has a bounded concession, owner and due date, but it should not be used to hide an untested CTQ or an unresolved safety issue.
Request another trial when the tool has been modified, the material or process basis changed, a critical feature was not measured, cavities differ materially, a functional test failed, or the acceptance report cannot establish sample identity. The next trial should state what changed and what evidence will be repeated. This makes the sign-off economical: the team can focus on the affected risk instead of restarting every check without reason.
For a buyer preparing a new program, the [FAQ](/faq) and [products](/products) routes can help frame application-specific questions before the RFQ. The most defensible acceptance record is one that another qualified reviewer can read later and understand exactly what was approved, what was not tested, and what must happen before production or transfer.

Practical takeaway
Before you move
to the next review.
- Freeze the part, mold, drawing, material, cavity-count and acceptance-test revisions before the final trial, and list every open assumption.
- Inspect the as-built mold for identification, interfaces, moving components, shutoffs, ejection, cooling, hot-runner or electrical requirements, safety and approved deviations.
- Require a traceable trial report covering machine, material grade and lot basis, cavity identity, settings, cycle information, sample IDs and tool condition.
- Measure CTQs using agreed datums, fixtures and methods; review assembly, function and cosmetic zones against released requirements and limit standards.
- Classify each finding as accepted, correction required or conditionally accepted, with concession authority, owner, due date and affected revision recorded.
- Release the tool only with the agreed handover package, maintenance and storage instructions, change-control route and a named signatory for the decision.
FAQ
Common questions
Does a T1 trial automatically mean the injection mold is accepted?
No. T1 is a trial milestone, not a universal acceptance standard. It may reveal tooling or molding issues and provide samples for fit or measurement, but the buyer should approve only the evidence and requirements defined for that program. A repeat trial or additional validation may still be needed.
What should an injection mold acceptance checklist include?
At minimum, cover the approved tool design and as-built condition, interfaces and safety, moving components, cooling or hot-runner checks, trial traceability, molded-part dimensions, appearance, assembly or function, deviations, handover documents, maintenance information and final release status. Add customer-specific tests or regulatory evidence when applicable.
How many samples are needed for tooling sign-off?
There is no universal number. The quantity should reflect the part risk, cavity count, customer requirement, inspection plan and whether the review is for learning, fit, first article or production readiness. Identify cavity and lot representation, and do not claim process capability from a small convenience sample.
Can a mold be conditionally accepted?
Yes, if the contract and product owner allow it and the limitation is explicit. The record should identify the exact departure, affected quantity or use, approver, corrective action, deadline and whether a new trial or inspection is required. Unmeasured critical features and unresolved safety issues should not be disguised as minor concessions.
What documents should be handed over with an accepted injection mold?
The package commonly includes the released or as-built tool information, component and spare-parts list, cooling and electrical details, operating and maintenance instructions, trial and inspection records, sample identification, material basis, change history and open-action disposition. The exact scope should follow the purchase order and application.
References
Source material
- [1] ISO, “ISO 20457:2018 Plastics moulded parts — Tolerances and acceptance conditions.”
- [2] NIST, “Measurement Uncertainty Considerations for Coordinate Measurement Machines.”
- [3] ASME, “Y14.5 — Dimensioning and Tolerancing.”
- [4] International Aerospace Quality Group, “9102 First Article Inspection Requirement.”
This guide is general information for early procurement and engineering discussion. It does not replace product-specific DFM, qualification, validation, regulatory assessment or legal advice.